MoMu restores: Walter Van Beirendonck Autumn/Winter 1996-97 wig

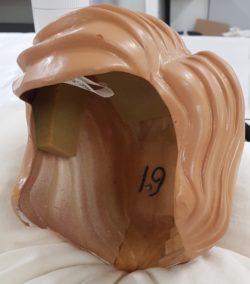
It was modelled by vacuum forming a thin plastic sheet with several layers of brown paint on it. On the back is a circuit board with electronic components such as wires, lights, an antenna and a battery. During the show, the lights really lit up. Inside, the artist applied brown tape, four pieces of polyurethane foam and the number '19' in black marker.
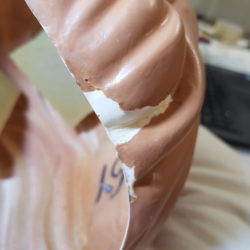
The opening of the wig is quite narrow and cracks and breaks appeared in the rigid plastic. The poor adhesion between paint and plastic also made the piece vulnerable. The paint came loose, pieces were missing and the damaged layers had been reinforced with tape. This meant that we could no longer exhibit the wig and it was also in danger of being damaged even more. The cracks and layers of paint needed to be stabilised, so restoring it was a necessity.
To make sure the plan would be successful, a number of tests had to be carried out first. What is the wig actually made of? Is the paint layer sensitive to water and/or solvents? Which materials are suitable for treatment? When conserving modern materials, it is important to know what kind of plastic you have in front of you. Using the ATR-FTIR technique, the Centexbel textile research centre identified it as polystyrene. You can also identify plastics by their external characteristics, sound or smell. The foam on the inside was therefore identified as a polyurethane and the circuit board on the back is presumed to be made of phenol formaldehyde. The coating around the electrical wires and antenna is PVC and the smaller parts are made of polystyrene and polyethylene. This one object therefore contains many different types of plastics. Some of those, such as polyurethane and PVC, are sensitive and can degrade rapidly.


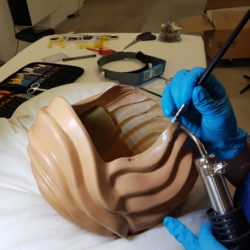
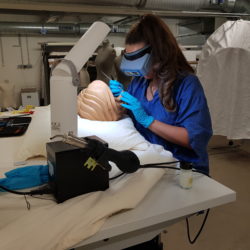
Loose dust or dirt was removed with a soft, goat-hair brush and spots were removed using demineralised water. The crooked lights and antenna were carefully bent back. A small brush was used to apply glue under the raised layers of paint. With a hot air gun and a silicone brush, the vulnerable layer of paint was put back in place. The fracture along the edge was glued and additionally reinforced with a piece of Japanese paper on the inside. Gaps in the paint layer were then filled and retouched. All of the materials – adhesives, fillers and retouching paints – are specific to restoration and are reversible.


After all, reversibility and minimal intervention form the essence of both conservation and restoration. The polyurethane foam on the inside was therefore not removed. Although it was already showing the first signs of degradation (a slight stickiness and loss of resilience), this is original material that was applied by the designer. The adhesive of the tape on the outside was degraded and difficult to remove without damaging the paint even more. The team therefore decided that part of the tape would be left in place. Though you can see a slight difference in sheen with the rest of the paint, this does mean that a larger piece of the original layer was preserved. The restoration was therefore aesthetic (removing stains, tape and retouching the paint) and structural (stabilising paint layers and fractures). The wig can now be put on without any problems.


